Saturday 21 November 2015

Lubrication and hammering

Finally I cut most of the 8mm smooth rods. First I tried with hacksaw with bimetal blade but that was just polishing the shaft. So I ended up using Dremel with 0.4mm cutting wheel. Actually several wheels as they were some no-name cheap ones and many of them shattered. A good reason to use safety glasses.

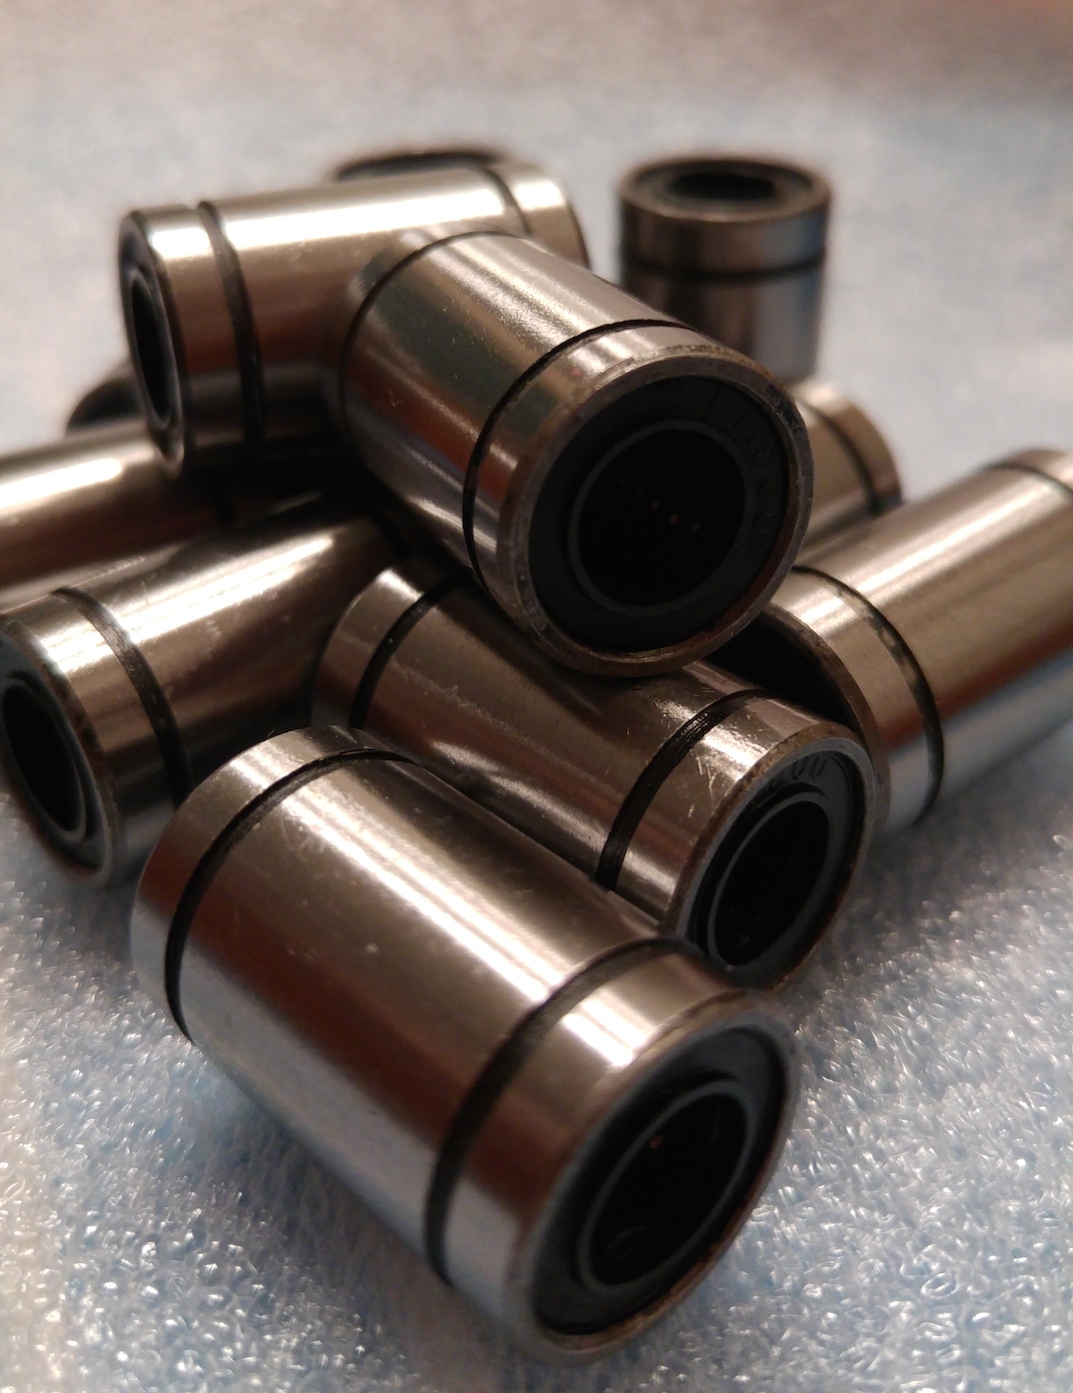
With Y-axis rods done I was able to try out LM8UU the bearings. As mentioned earlier, I bought some very cheap ones and they definitely behaved like that. Replacing them with better ones or with IGUS is on my todo. I cleaned up the linear bearings and lubricated them with lithium based grease. As an afterthought the grease might have been a bit too thick and sticky for such small bearings.

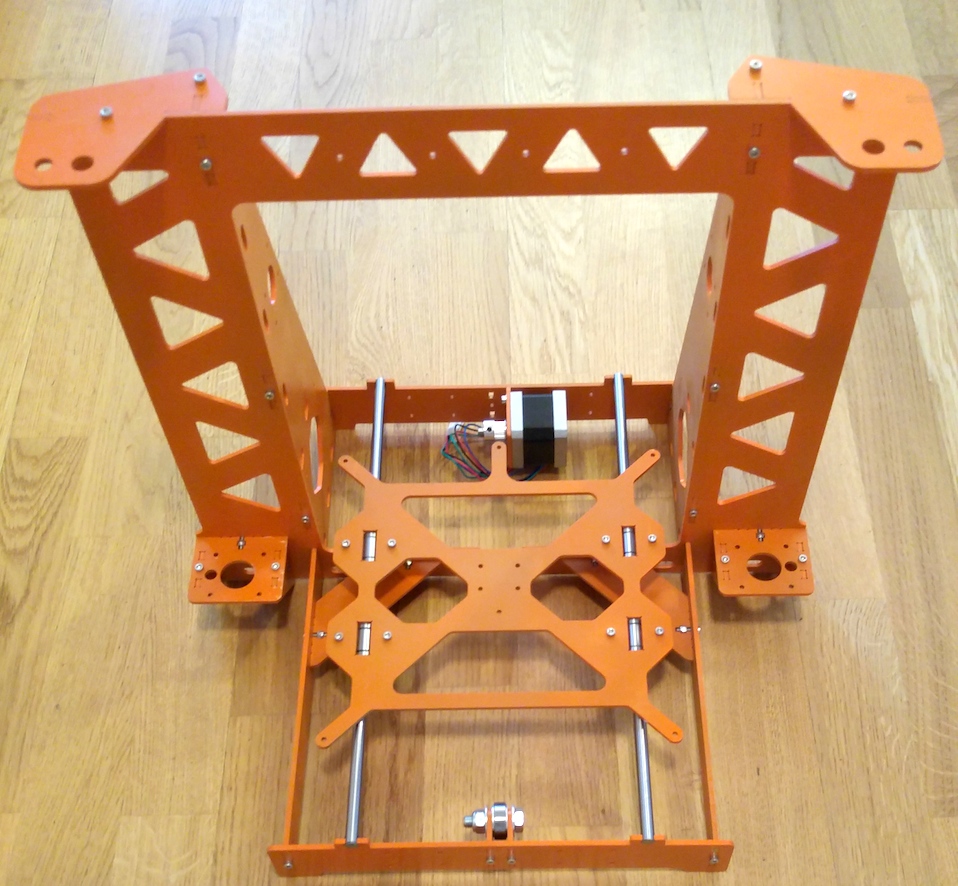
Y-axis rods in place

After hammering the rods in place I also installed the first stepper motor. I bought a package of five stepper motors and they are all ACT Motor 17HS4417. They should be ok but I will see later how they perform. I don't expect very high acceleration for Y-axis as the build plate carriage is quite heavy even without any heatbed or glass. I will attach the belt as soon as I get some more printed parts for the carriage.
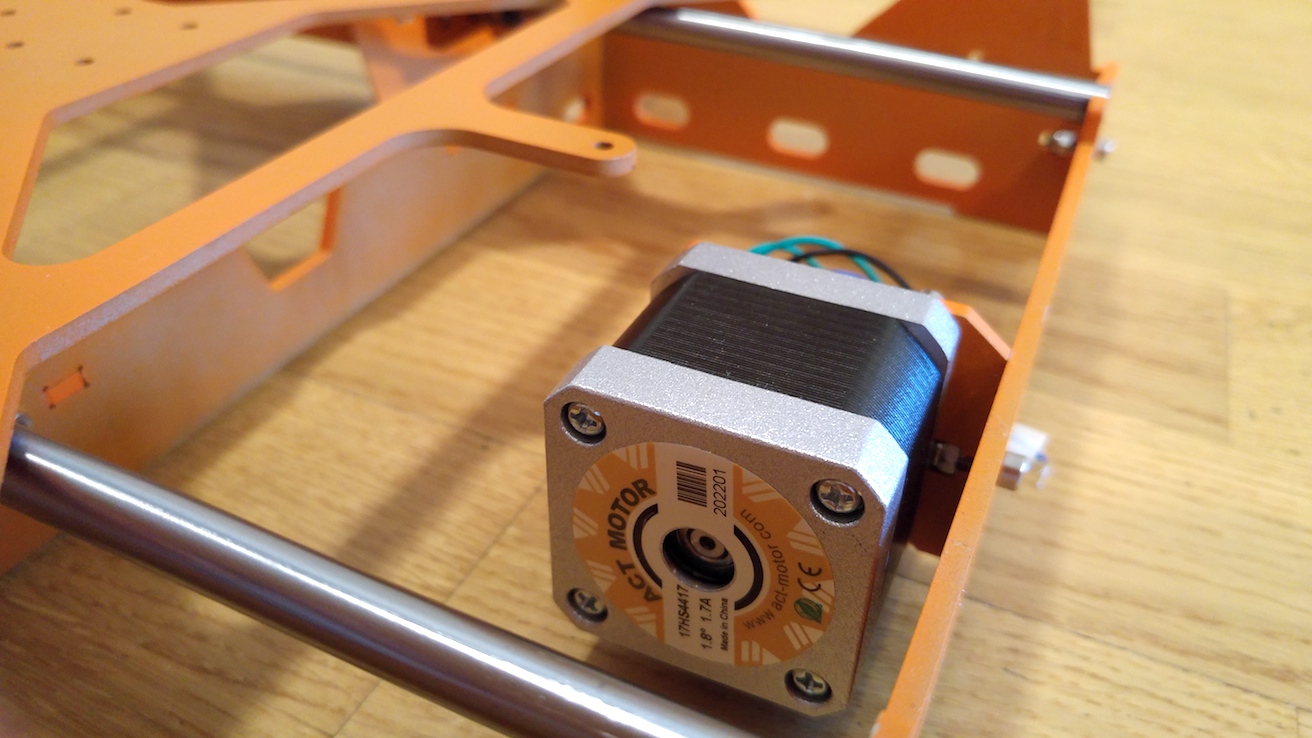
17HS4417 in place

Friday 20 November 2015

Bearings

Pile of LM8UU


Both LM8UU and 608ZZ bearings arrived and I have installed one bearing so far.  Y-axis idler was the only one that does not require 8mm shafts to be cut and ready. I went through 608ZZ bearings and selected the one that did not feel like having gravel inside. No issues here, except I didn't have M8 bolt and nut so a quick run to local hardware store was required. I might replace this with smaller bearing as in Toolson design.

Y-axis idler


Monday 16 November 2015

Final painting and some assembly

Alright. Orange is the color. I painted the orange color on Sunday and this time I did have a tiny bit better place to do it. I went to my brother's garage to change winter tyres and to paint the frame in the corner of it. The garage was rather full of motorbikes and cars so I had to be careful with spraying. I used a Maston colormix spray can but I don't really recommend it. Also the temperature inside was only +12. And I ran out of paint. So as you might guess the end result was not very good - a combination of dust, dry paint and runny paint. I don't say I hate many things but painting with poor setup, in a hurry and with bad quality tools is one of them.

More or less orange


Today I put together all the frame parts I could. I am still waiting bearings to arrive so I could not proceed with any of the axis yet. But at least I have received M5 brass nuts, stepper motors, GT2 pulleys and belt.

Oh, by the way - did I say I hate painting?


Wednesday 11 November 2015

8mm smooth rods

I believe good quality rods are essential for the printer operation so I decided to skip cheapest ones. I bought Cf 53 h6 8mm HRC 60-64 rods from SKS. The price was around 14e per meter and I bought enough for two printers and some spare. At the moment long rods are waiting to be cut to correct length. Today I had just enough time to wipe them with Anti-Corrol gun oil before storing them away.

Oh, and date is 11.11 so I ordered bunch of electronics from AliExpress.

Enclosure planning

While waiting some parts to arrive I have been thinking what kind of enclosure this printer will get. There are several reasons to have one and most of them are related to safety. I am planning to have HEPA and carbon filter for the exhaust in order keep the fumes and particles in minimum. The enclosure also serves as a sound proofing and depending on material and design some fire protection might be achieved. Naturally the temperature can be controlled better inside enclosure and this should improve print quality on ABS and some other materials.

I happen to have a spare Arduino Uno which will became the controller of the printer main relay. The actual printer hardware like RAMPS, Steppers and heated bed are powered by 12V line through that relay. Arduino Uno will monitor temperature readings and keep the relay closed only if values are within safe limits. It will also control enclosure exhaust fan speed in order to maintain desired enclosure temperature.

The design and materials of the enclosure are still undecided. Most likely something like a 50 x 50 x 50 cm cube with door on one side.

Tuesday 10 November 2015

Painting the frame

Test assembly after couple layers of primer

Spray painting with aerosol cans is not my favourite hobby as the results usually are poor. To make things even more complicated it is rather cold and damp outside so I have to wait to get access to a decent indoor painting area. Bathroom does not work as the paint dust tends to wander out and trigger fire alarm. In the middle of the night of course.


Friday 6 November 2015

Laser cut frames arrived

Today I received the laser cut frames of the P3Steel V2.5 DXL. Material is 3mm structural steel S355 and parts were ordered without any further finishing after the laser cut. This means there is a little bit of cleanup, sanding and painting to do. I ordered 10 sets and at the moment there are six frames available all the frames were gone or reserved within ten days.

Parts stacked and counted

In the next couple of days I will clean up my frame and prime it. The final color will be selected and painted after the main frame assembly is done as I don't want to scratch the shiny new surfaces.

Monday 2 November 2015

Power supply modification

My  HP DPS-600PB B arrived today and I managed to modify it to supply 12V without additional hardware attached. The modification is really simple and requires only basic soldering skills, no need to open the PSU enclosure.

HP DPS-600PB B

Before anything else I plugged the unit in. The fan started to rotate but no 12V output. The next step was to unplug it, heat up the soldering iron and solder pins 4, 6, 8 and 10 together.

Pins 4, 6, 8 and 10 soldered together. Two ground connectors on the left and two +12V on the right.


Then I powered up the unit again and I measured 12V outputs again. Now I got nice 12.5V without load. I did not invent this myself - these units are very popular among RC hobbyists and all kind of modifications have been created. I was happy to get 12V 47A with 30 euros. I still need to come up some decent connectors for outputs and I might remove the handle and the red locking tab.

http://www.rcgroups.com/forums/showthread.php?t=2371780
http://www.rcgroups.com/forums/showthread.php?t=1581061