Thursday, 31 December 2015
Missing parts
Xmas holiday, family illnesses and some missing bits have kept this project on hold for a moment. I was about to assemble X and Z axises but the horrible quality of LM8UU put me off. I decided to order another batch of bearings from a different seller. Hopefully they will a bit better quality. I have been also waiting quite long some electrical supplies like heat protective sleeving and heat shrinking tube. Finally, those arrived today and I will be able to solder some of the wires soon.

Friday, 4 December 2015
A4988 drivers and Vref adjustment
After verifying the LCD works I went forward with electronics. I placed the heat sinks on the A4988 drivers and plugged them on the RAMPS board. Based on the instructions and markings I placed them right way and started to think about Vref adjustment. This is for the motor current and I followed the instructions on the RepRapWiki. My drivers have Rs=100 Ohm and I wanted to start safe with 0.7A so I adjusted them to have Vref of 570mV.


A4988 drives with heat sinks
Marlin firmware
In order to get Arduino Mega clone and RAMPS board to function properly I need to install a firmware to Arduino. There are several choices but I decided to start with Marlin. It seems to be actively maintained and has good support.
I downloaded release version 1.0.2 and started to work with the configuration file. I did not modify too many settings at this point. I only selected correct motherboard settings and enabled LCD support. After uploading the firmware I disconnected Arduino and pressed the RAMPS board on it. I also hooked up the LCD screen cables and powered everything up. The LCD lit up and the menu was operational so I guess it works ok.

I downloaded release version 1.0.2 and started to work with the configuration file. I did not modify too many settings at this point. I only selected correct motherboard settings and enabled LCD support. After uploading the firmware I disconnected Arduino and pressed the RAMPS board on it. I also hooked up the LCD screen cables and powered everything up. The LCD lit up and the menu was operational so I guess it works ok.

Thursday, 3 December 2015
Electronics arrived
We had a postal strike here in Finland so not much happened for a while. But today I got some packages! My Arduino Mega clone, RAMPS and bunch of other stuff arrived.

I have an original Arduino UNO so the Arduino IDE was already familiar to me. I'll leave installation of the electronics for the weekend but I wanted to test the Mega board first. But it did not work straight away with OS X 10.9. The simple LED blinking code refused to upload to the board. The error was following:
avrdude: ser_open(): can't open device "COM1": No such file or directory ioctl("TIOCMGET"): Inappropriate ioctl for device
So after a couple searches I learnt I should install a new USB driver. The instructions and driver can be found here: http://kiguino.moos.io/2014/12/31/how-to-use-arduino-nano-mini-pro-with-CH340G-on-mac-osx-yosemite.html
After running the installer and reboot the Arduino IDE was able to upload the code and LED blinker works fine now.
Saturday, 21 November 2015
Lubrication and hammering
Finally I cut most of the 8mm smooth rods. First I tried with hacksaw with bimetal blade but that was just polishing the shaft. So I ended up using Dremel with 0.4mm cutting wheel. Actually several wheels as they were some no-name cheap ones and many of them shattered. A good reason to use safety glasses.
With Y-axis rods done I was able to try out LM8UU the bearings. As mentioned earlier, I bought some very cheap ones and they definitely behaved like that. Replacing them with better ones or with IGUS is on my todo. I cleaned up the linear bearings and lubricated them with lithium based grease. As an afterthought the grease might have been a bit too thick and sticky for such small bearings.

After hammering the rods in place I also installed the first stepper motor. I bought a package of five stepper motors and they are all ACT Motor 17HS4417. They should be ok but I will see later how they perform. I don't expect very high acceleration for Y-axis as the build plate carriage is quite heavy even without any heatbed or glass. I will attach the belt as soon as I get some more printed parts for the carriage.

With Y-axis rods done I was able to try out LM8UU the bearings. As mentioned earlier, I bought some very cheap ones and they definitely behaved like that. Replacing them with better ones or with IGUS is on my todo. I cleaned up the linear bearings and lubricated them with lithium based grease. As an afterthought the grease might have been a bit too thick and sticky for such small bearings.

Y-axis rods in place
After hammering the rods in place I also installed the first stepper motor. I bought a package of five stepper motors and they are all ACT Motor 17HS4417. They should be ok but I will see later how they perform. I don't expect very high acceleration for Y-axis as the build plate carriage is quite heavy even without any heatbed or glass. I will attach the belt as soon as I get some more printed parts for the carriage.
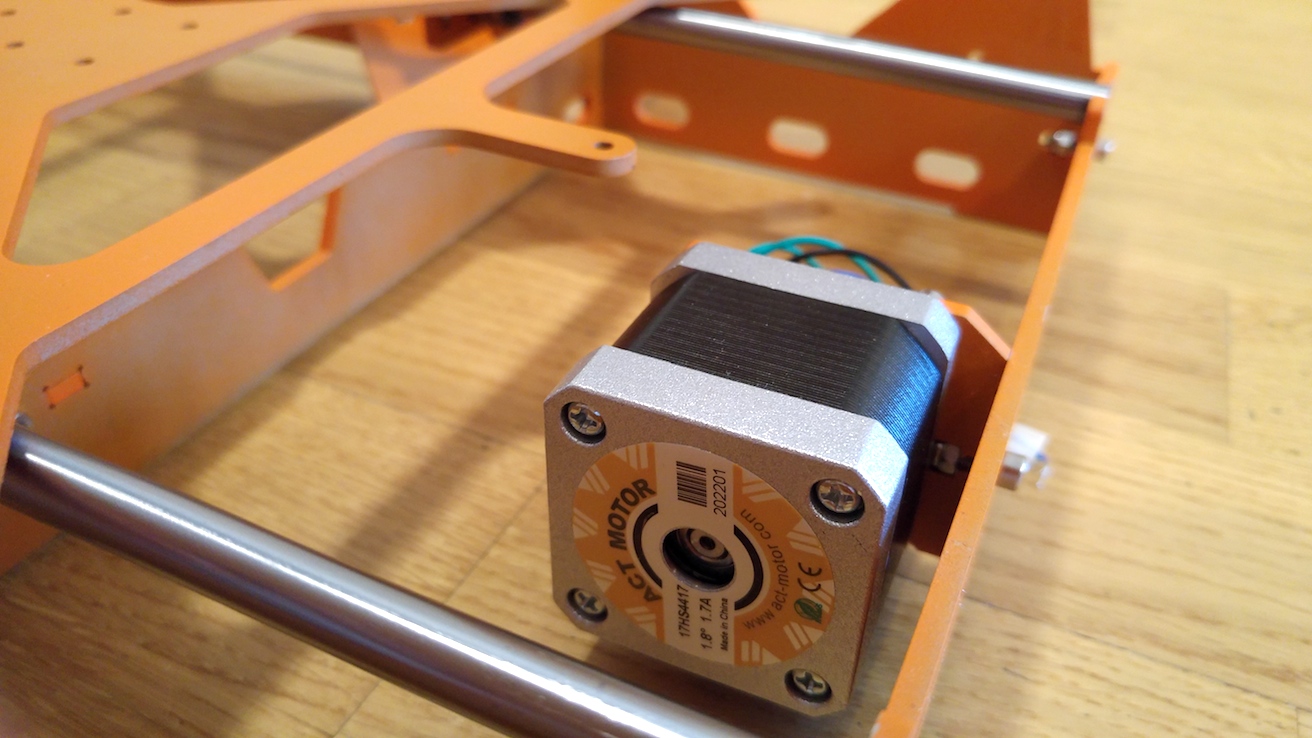
17HS4417 in place
Friday, 20 November 2015
Bearings

Pile of LM8UU
Both LM8UU and 608ZZ bearings arrived and I have installed one bearing so far. Y-axis idler was the only one that does not require 8mm shafts to be cut and ready. I went through 608ZZ bearings and selected the one that did not feel like having gravel inside. No issues here, except I didn't have M8 bolt and nut so a quick run to local hardware store was required. I might replace this with smaller bearing as in Toolson design.

Y-axis idler
Monday, 16 November 2015
Final painting and some assembly
Alright. Orange is the color. I painted the orange color on Sunday and this time I did have a tiny bit better place to do it. I went to my brother's garage to change winter tyres and to paint the frame in the corner of it. The garage was rather full of motorbikes and cars so I had to be careful with spraying. I used a Maston colormix spray can but I don't really recommend it. Also the temperature inside was only +12. And I ran out of paint. So as you might guess the end result was not very good - a combination of dust, dry paint and runny paint. I don't say I hate many things but painting with poor setup, in a hurry and with bad quality tools is one of them.

Today I put together all the frame parts I could. I am still waiting bearings to arrive so I could not proceed with any of the axis yet. But at least I have received M5 brass nuts, stepper motors, GT2 pulleys and belt.
Oh, by the way - did I say I hate painting?

More or less orange
Today I put together all the frame parts I could. I am still waiting bearings to arrive so I could not proceed with any of the axis yet. But at least I have received M5 brass nuts, stepper motors, GT2 pulleys and belt.
Oh, by the way - did I say I hate painting?
Subscribe to:
Posts (Atom)